

Federating Google Cloud Identities with Azure Active Directory

I recently started working with GCP, and as with most public cloud platforms, the first challenge is identity management. GCP allows federation from multiple sources, and if you have a Microsoft stack like Active Directory, you have some great options. In my case, I wanted to test scenarios where identities already exist in Azure AD and leverage its enterprise-level features to establish trust with Google Cloud Identity. This allows us to do the following with minimal effort:
- Provision users, groups, and group memberships:
The connector allows you to provision users and groups that are already in Azure AD to Google Cloud Identity. - Single Sign-On (SSO):
Google Cloud delegates authentication to Azure AD using SAML. - Conditional Access Policies
- Multifactor Authentication
Note:
Unfortunately, there is a limitation: Microsoft currently does not allow syncing nested groups through Enterprise Applications. Most enterprises use nested groups, but you cannot sync them through the connector.
The diagram below depicts the flow process for provisioning and Single Sign-On. I used one Enterprise Application for both provisioning and SSO.
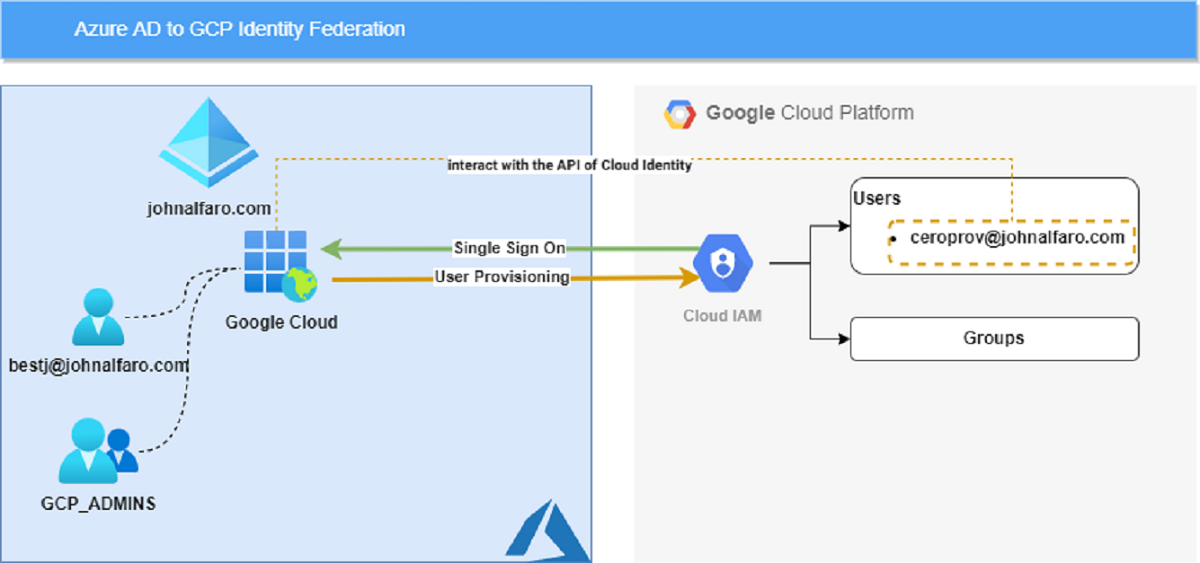
Google Requirements
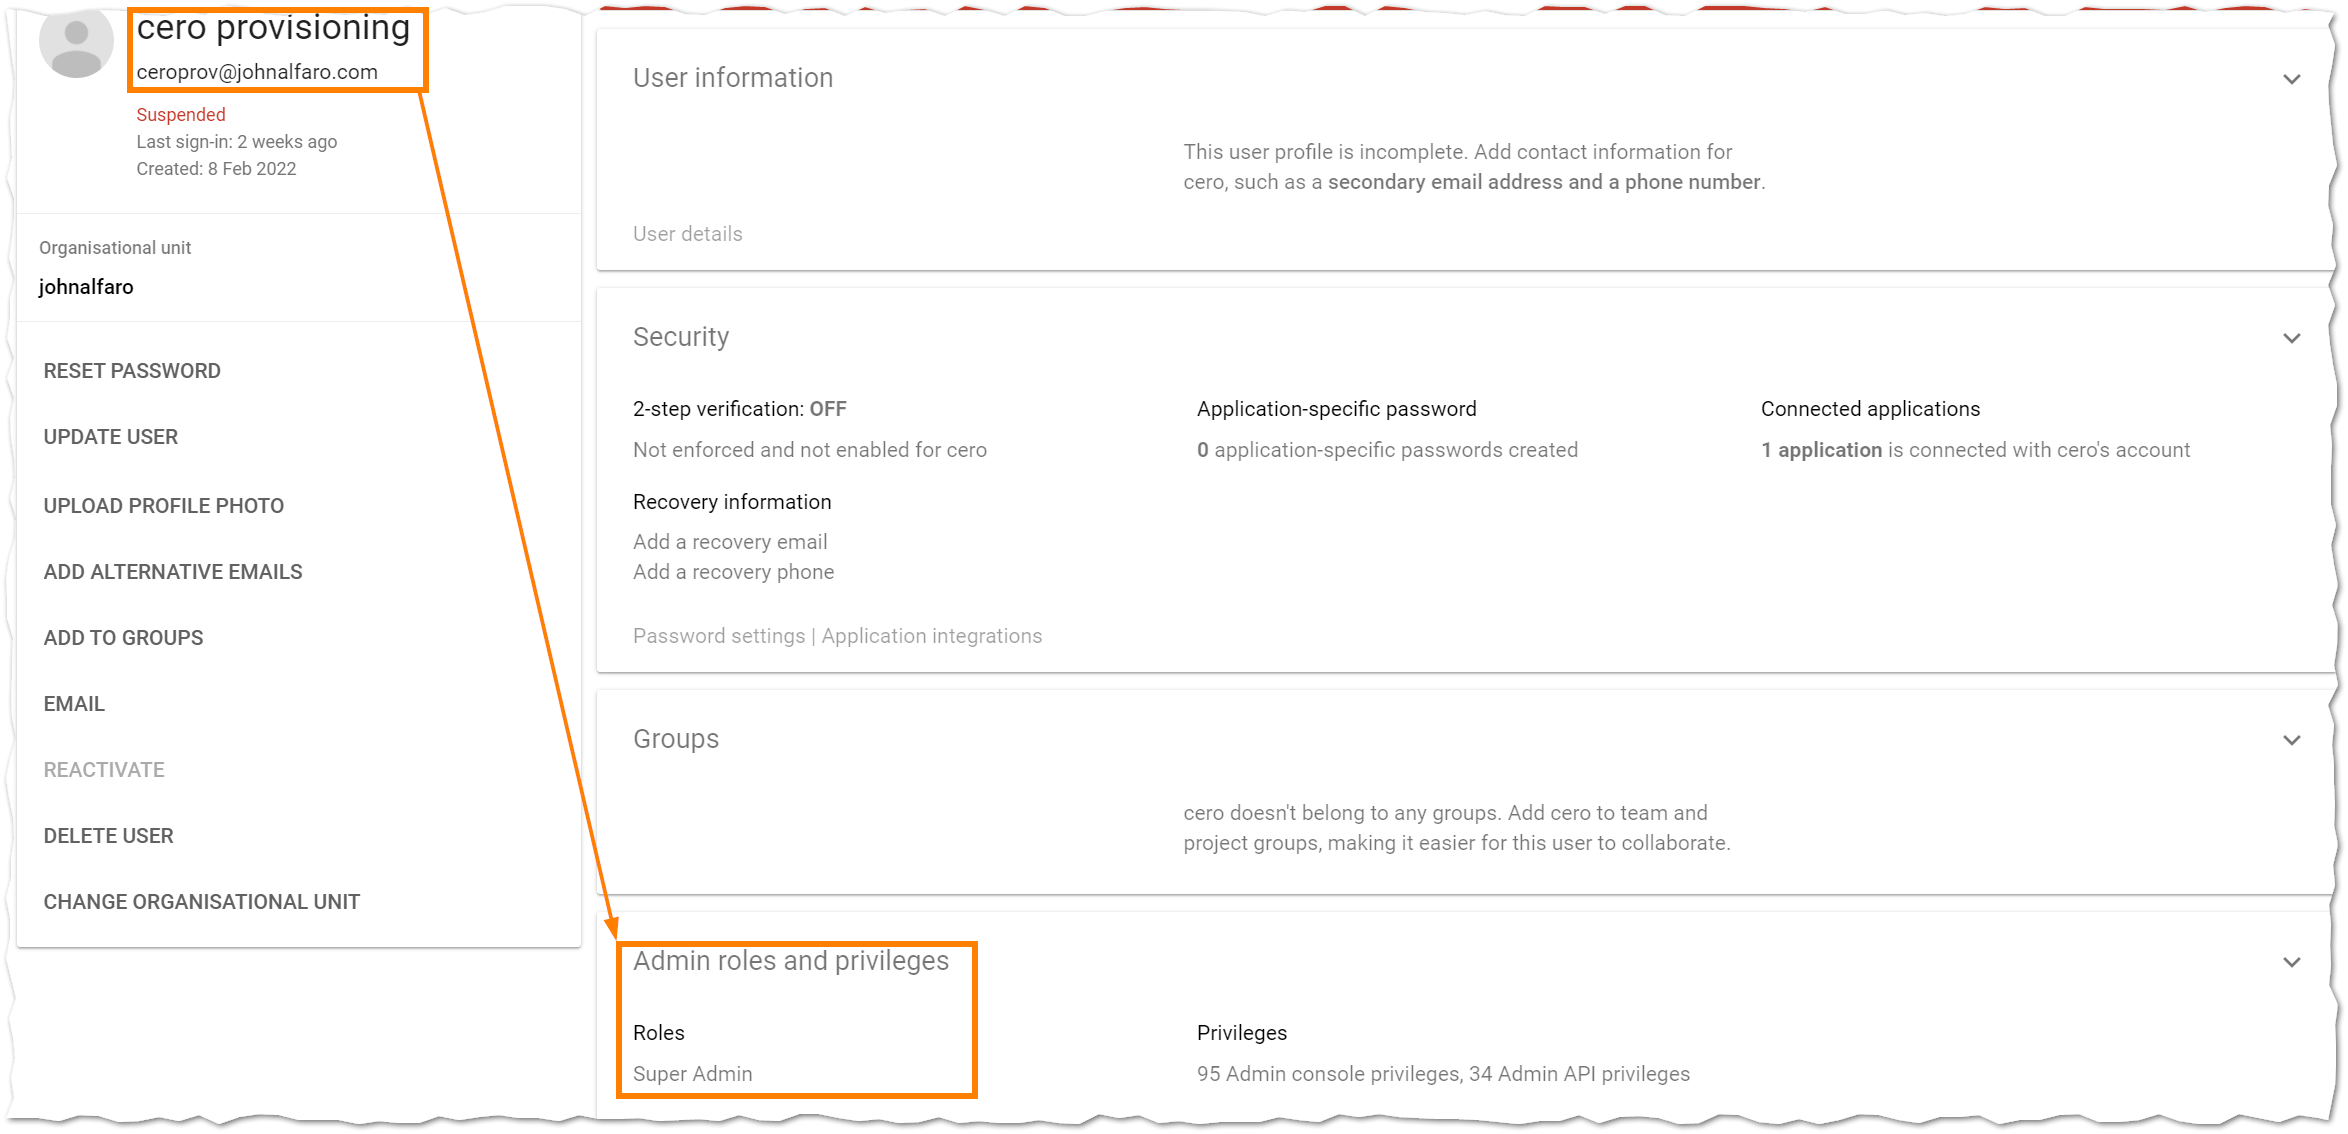
You need to create a user account in the GCP Admin Console. For my PoC, it is [email protected], and it needs super-admin permissions. This account will authorize the creation of groups and users on the GCP side.
Azure AD Requirements
There are a few settings to configure in Azure AD to enable the Enterprise Application for both user provisioning and SSO. Ensure you have the correct permissions. The following roles (from highest to lowest) can perform these tasks: Global Administrator, Cloud Application Administrator, or Application Administrator.
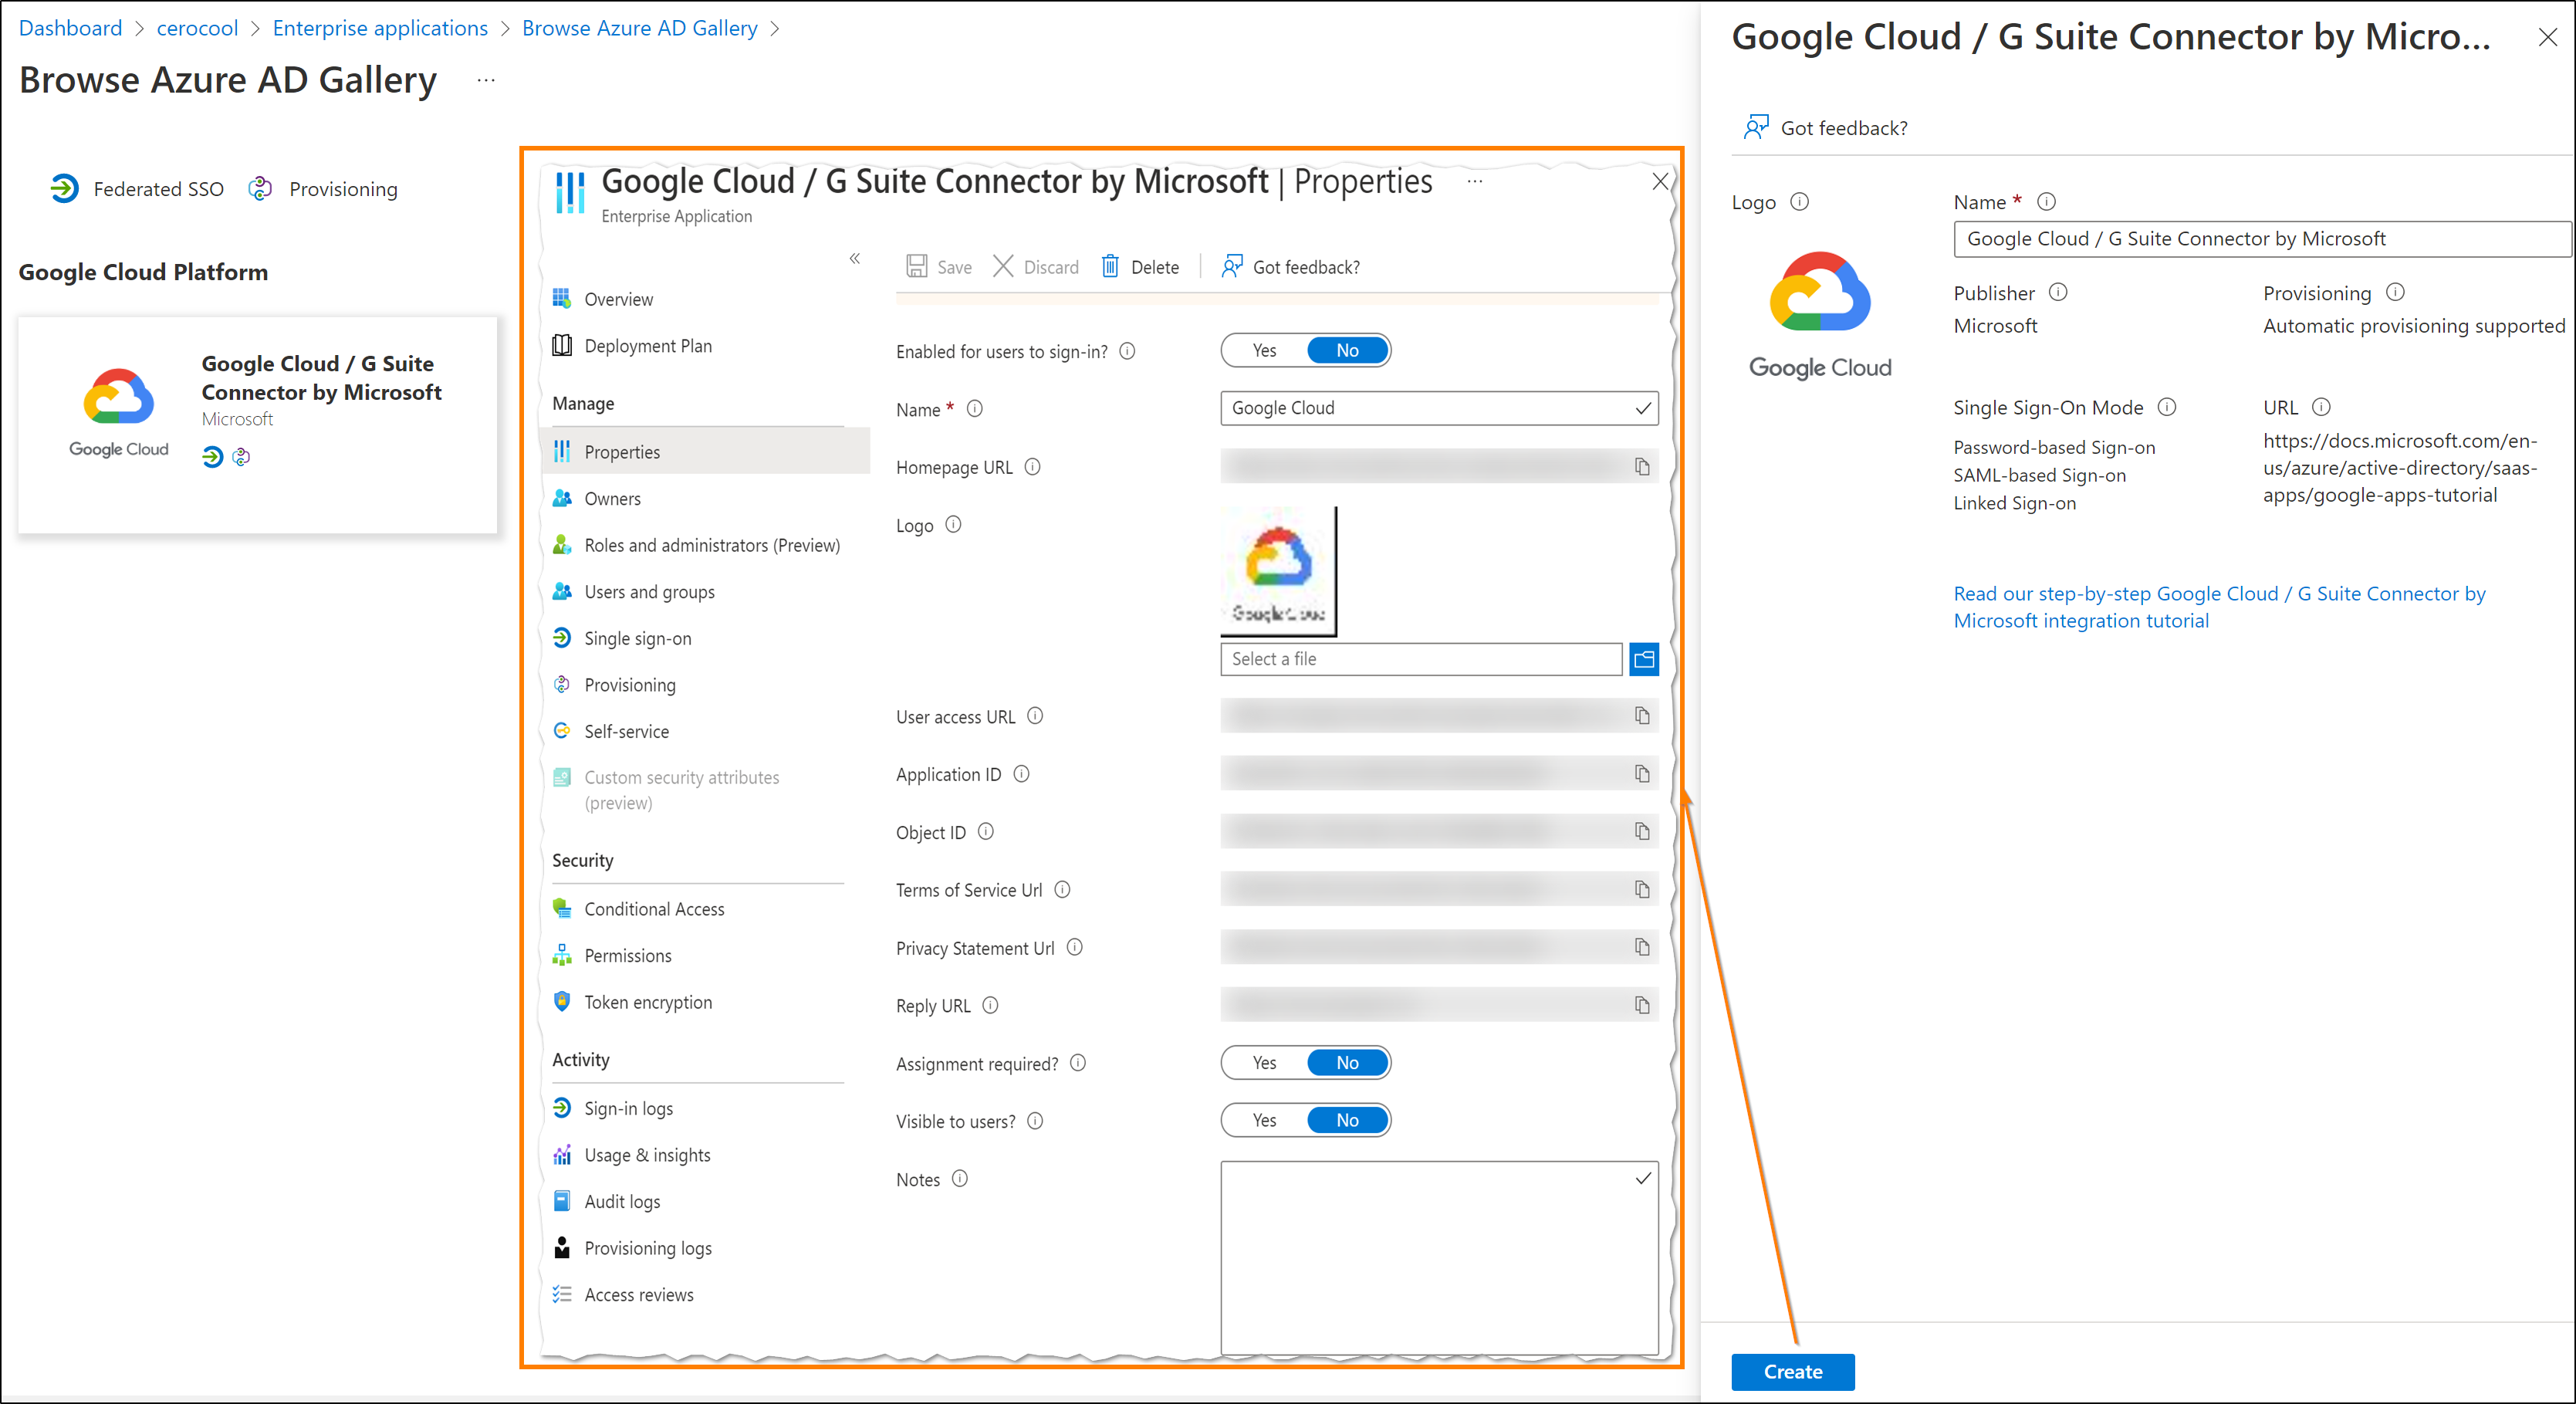
- Create the Google Cloud Connector Enterprise Application:
Search forGoogle Cloudand selectGoogle Cloud/G Suite Connector by Microsoft. Configure the following:- Set
Enabled for users to sign-intoYes. - Set
User assignment requiredtoYes. - Set
Visible to userstoNo.
- Set
- Provisioning Settings:
- Set
Provisioning ModetoAutomatic. - Set
Admin Credentialsand thenAuthorize.
Use the[email protected]account to authorize the application. Allowing this confirms access to the GCP Cloud Identity API.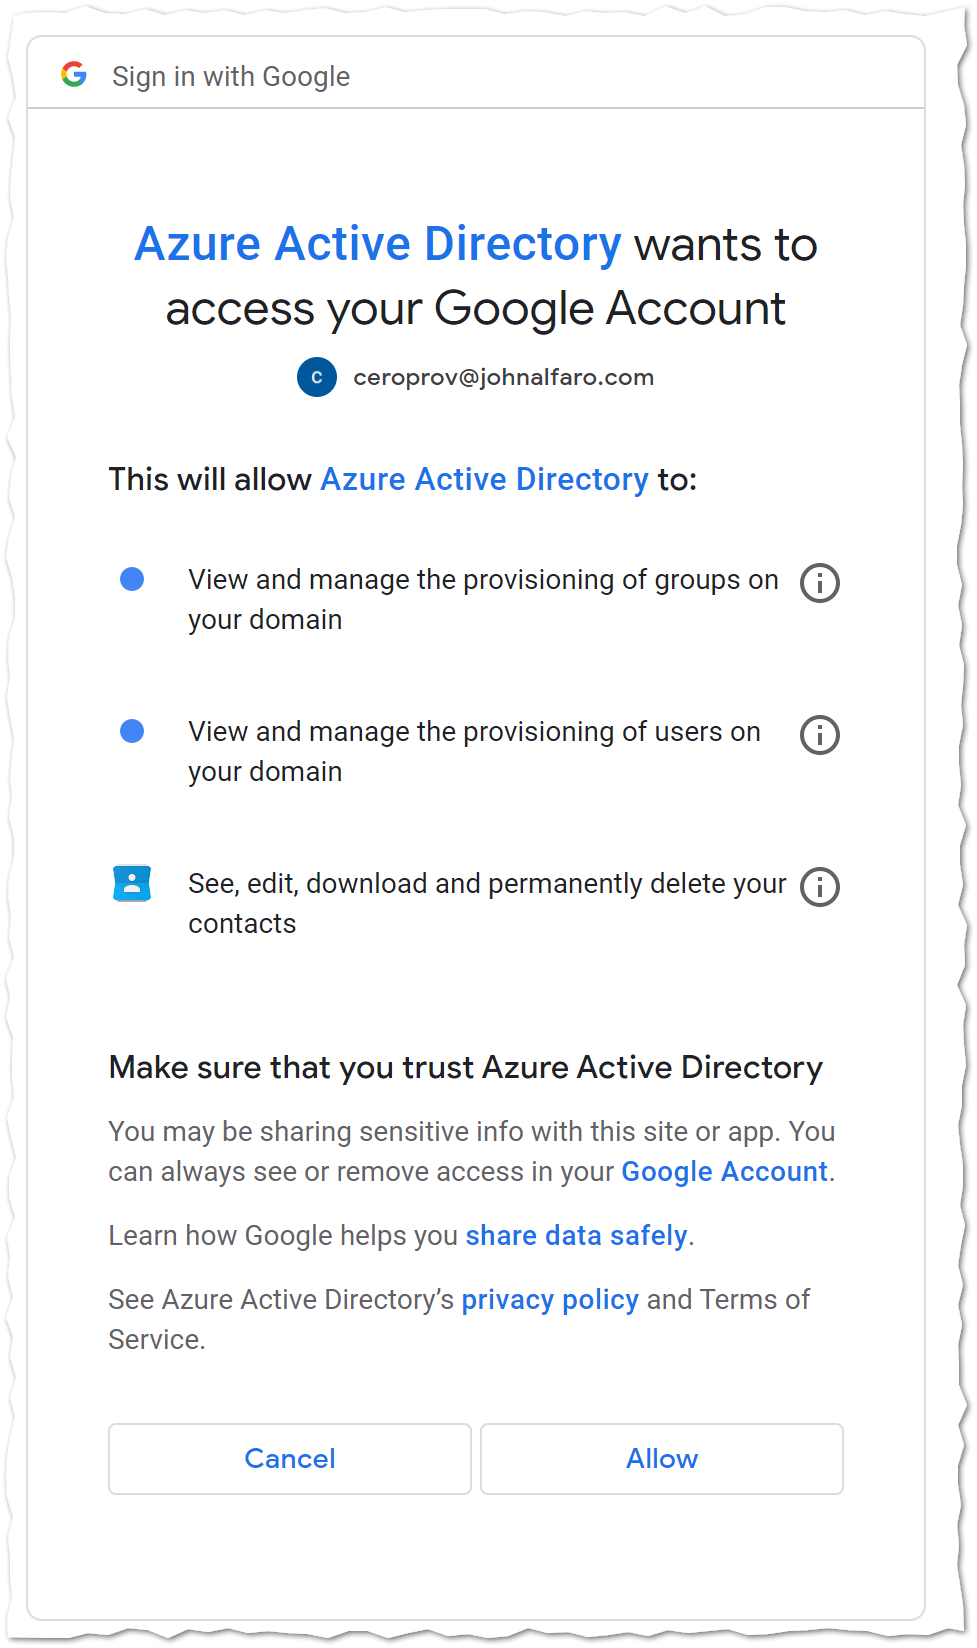
- Set
- Test the connection to ensure you can authenticate to the API.
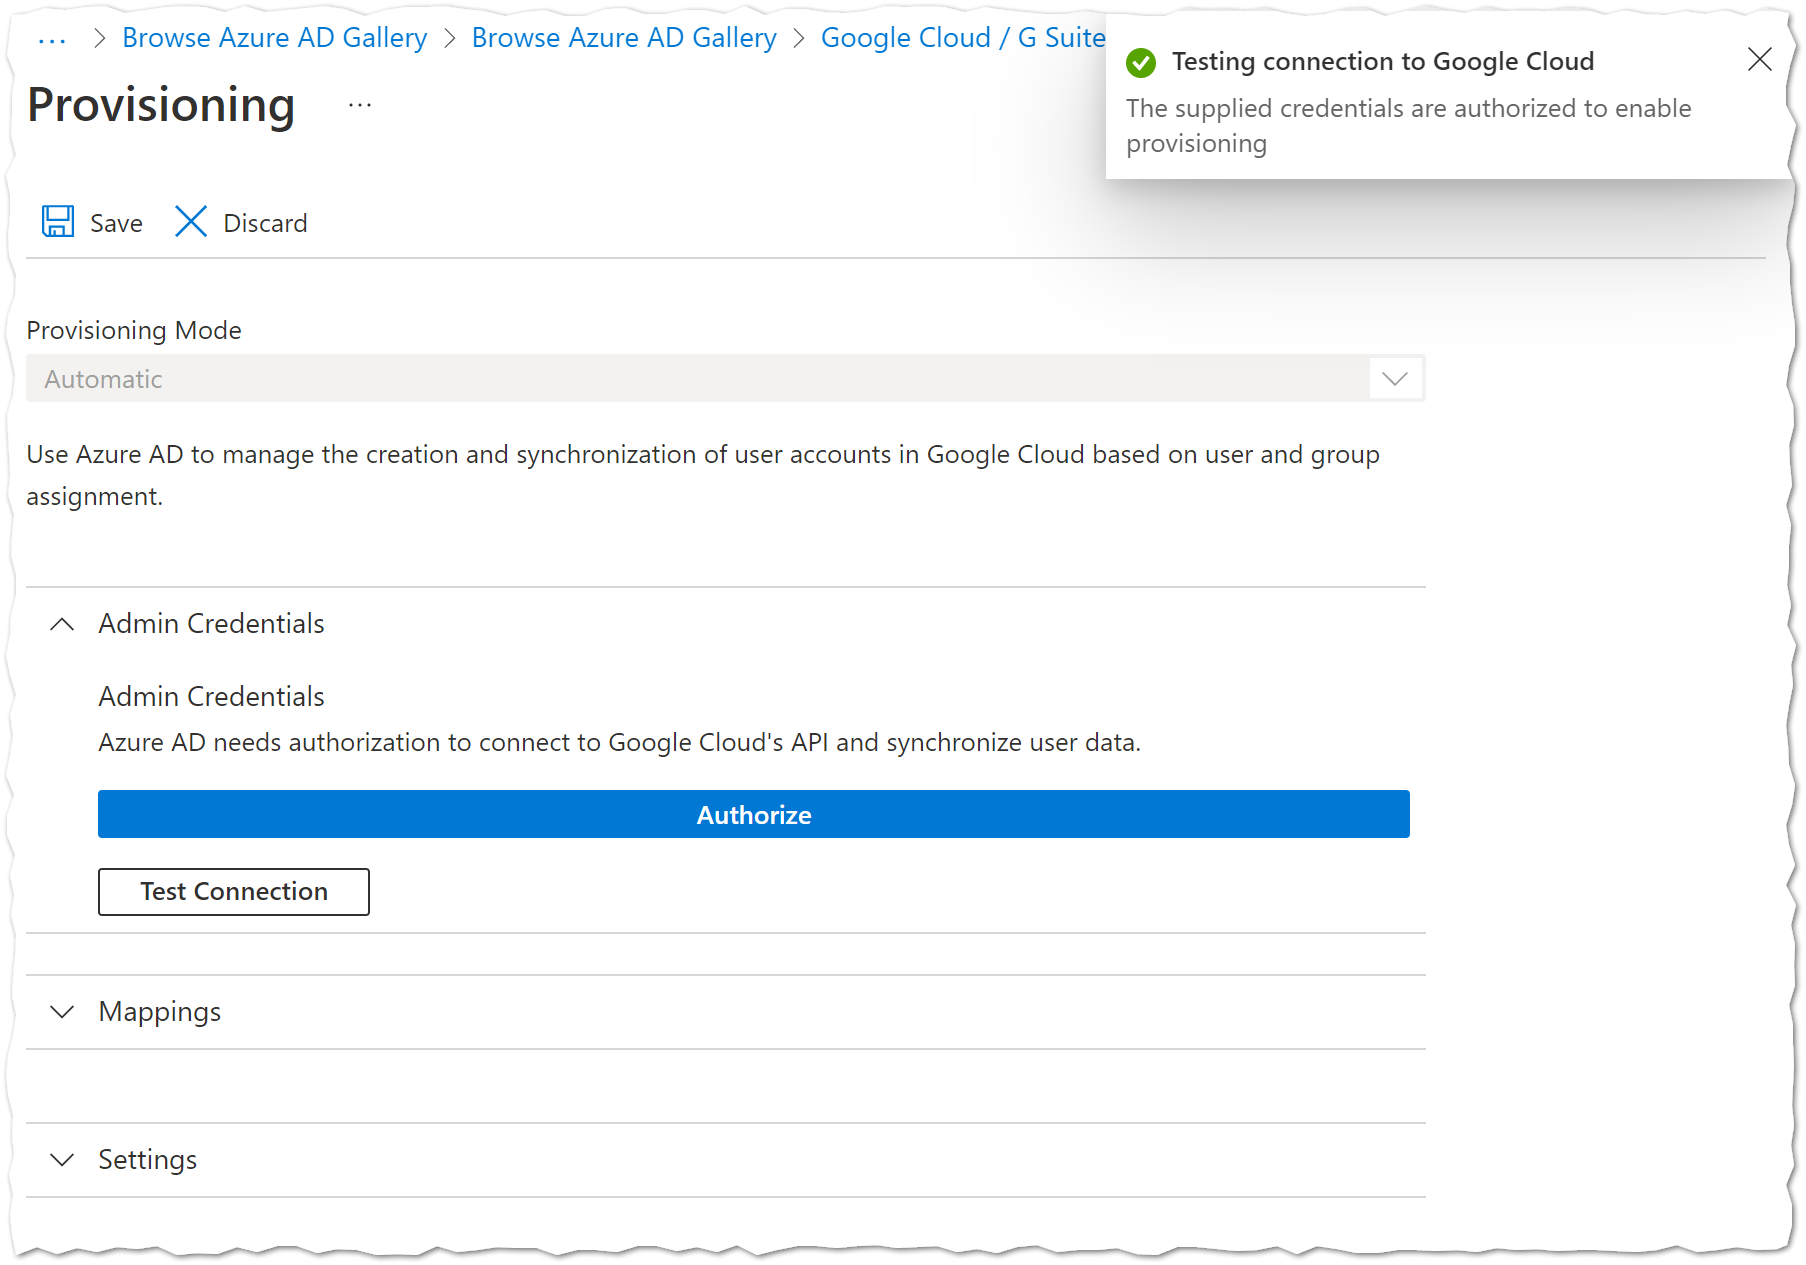
Important:
Always keep security in mind and use credentials with the least privileged access.
Configure User/Group Provisioning
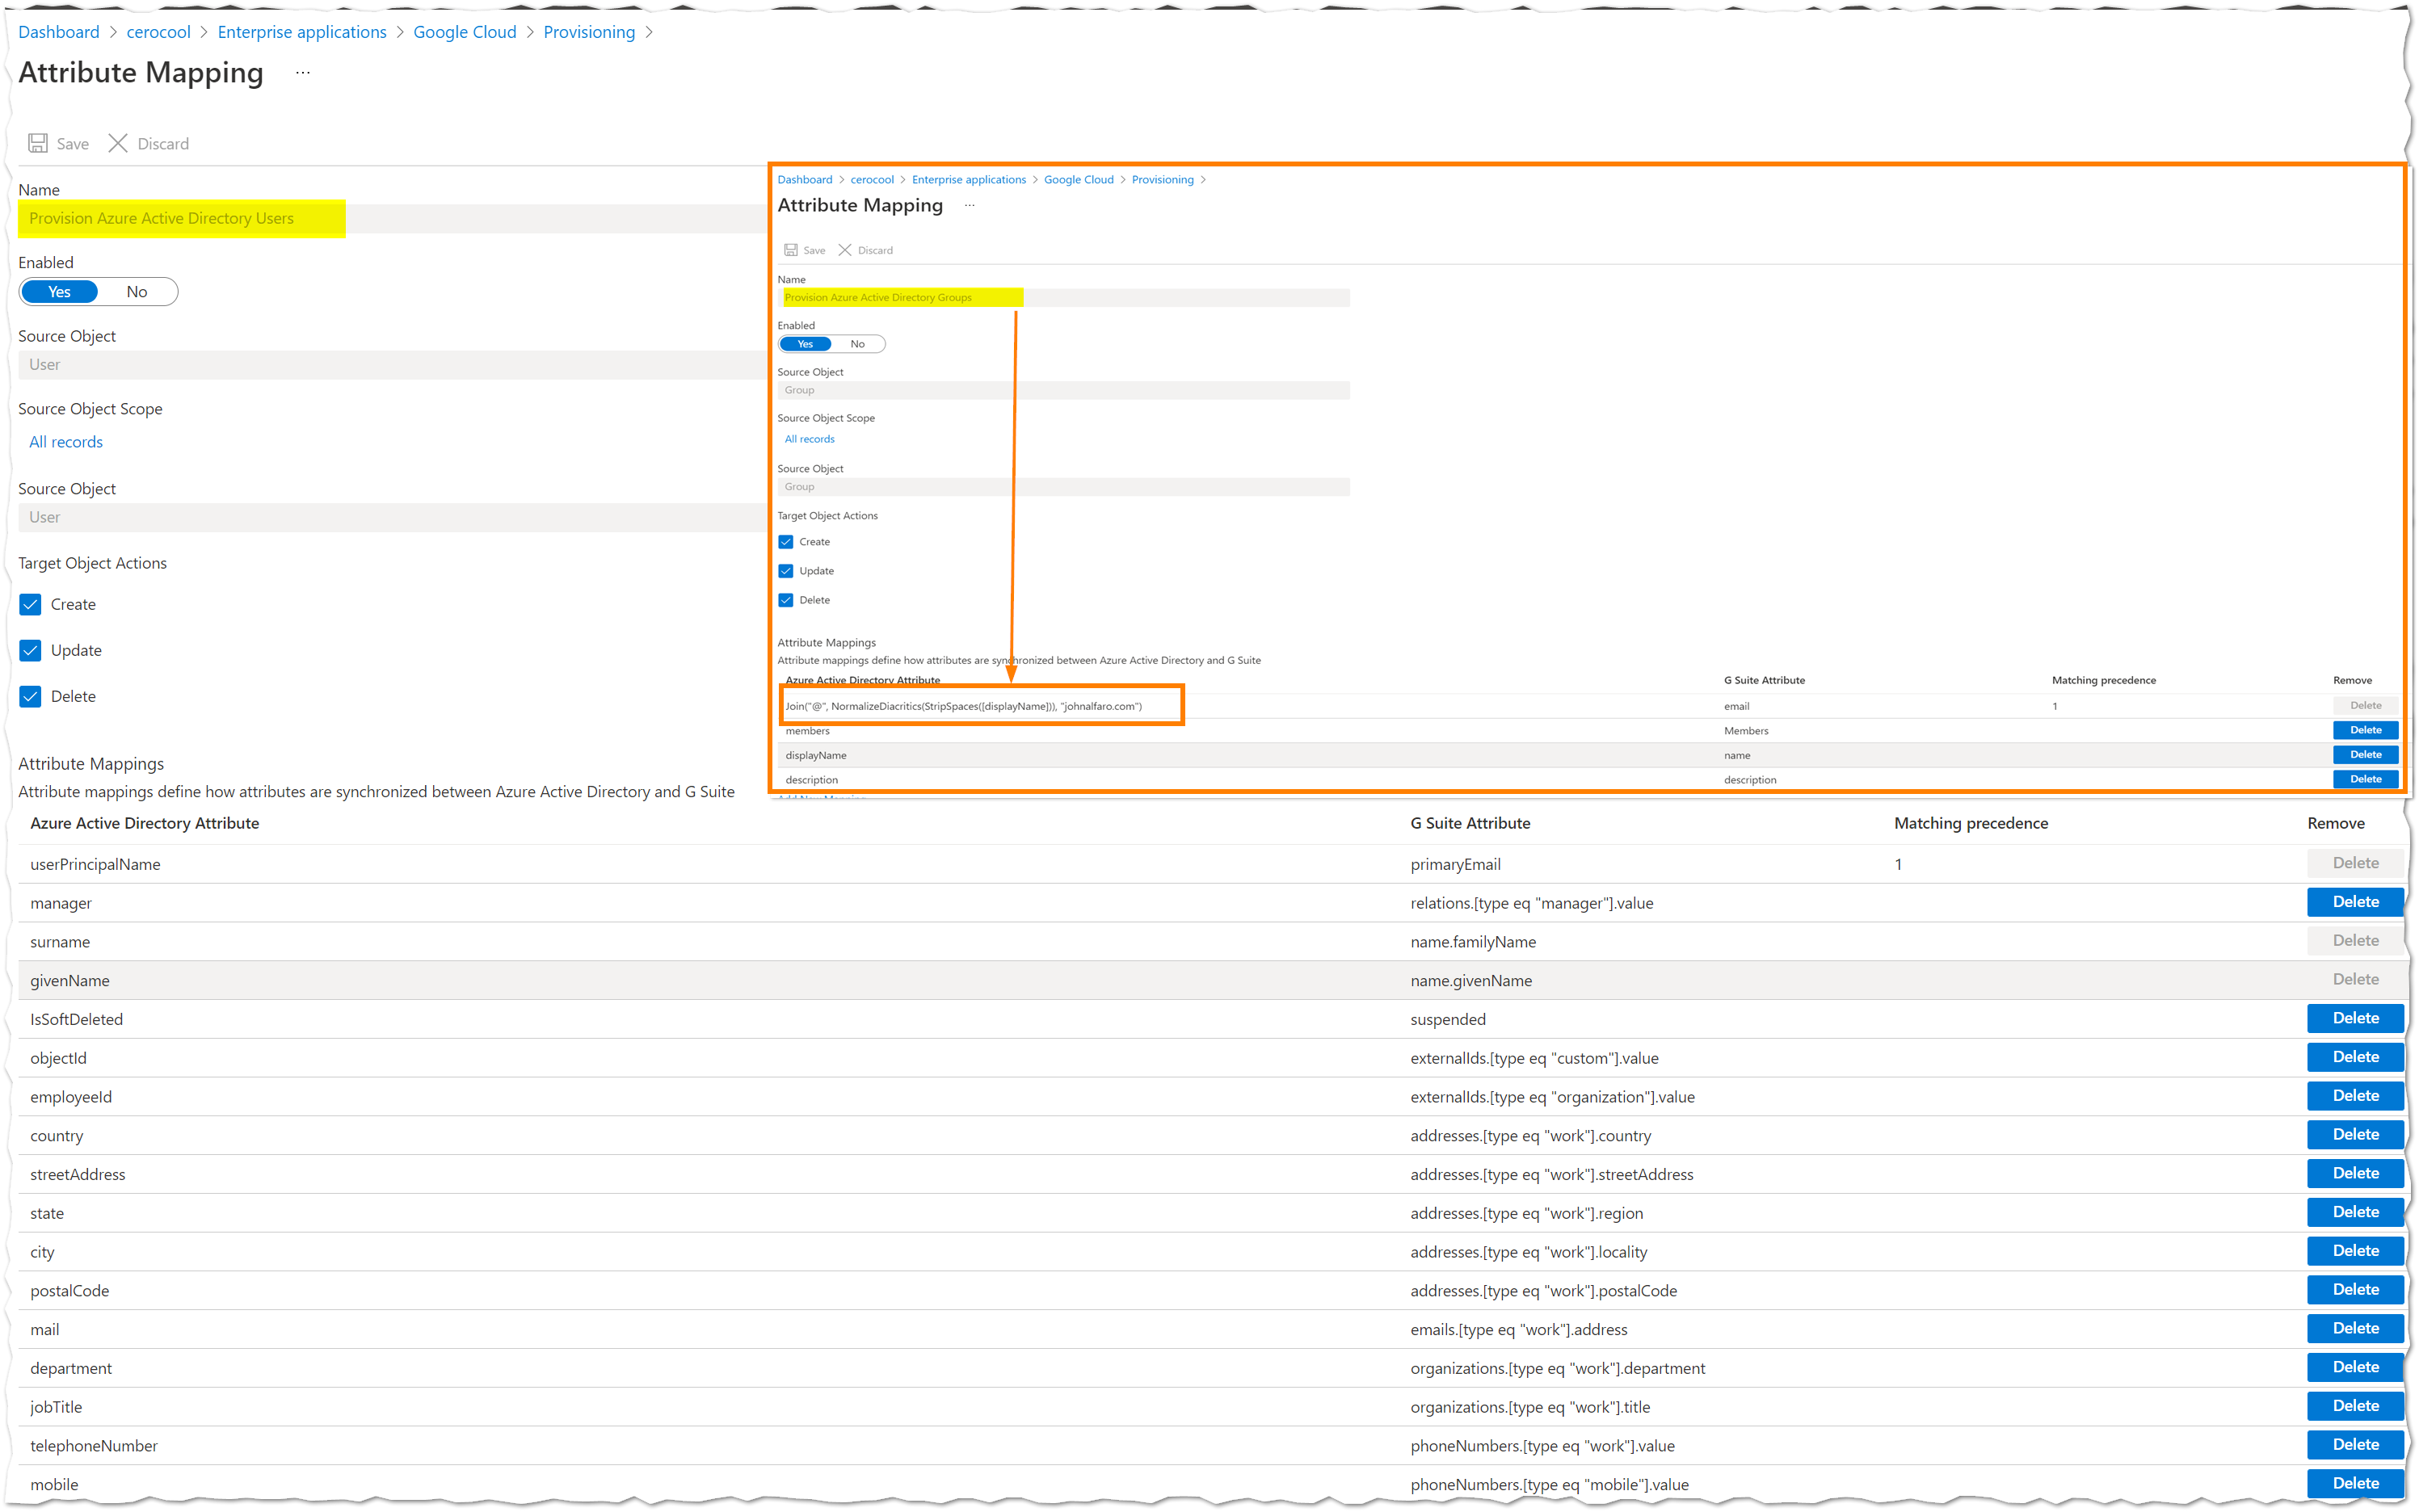
In Azure AD, configure the mapping of users and groups to the GCP Cloud Identity API.
User Provisioning
I used the UPN to configure user mapping. This is the unique identifier in Azure AD. The GCP documentation provides details on mapping.
- Under
attribute mapping, select the rowsurnameand setDefault value if nullto_. - Under
attribute mapping, select the rowgivenNameand setDefault value if nullto_.
Group Provisioning
I used the Name to configure group mapping. The GCP documentation recommends editing the mail attribute in attribute mappings, changing the mapping type to Expression, and setting the expression as below. Replace johnalfaro.com with your registered domain.
I also set Sync only assigned users and groups to avoid syncing all users and groups, which is recommended for any organization.
Join("@", NormalizeDiacritics(StripSpaces([displayName])), "johnalfaro.com")
User and Group Syncing
Now it’s time to test the connector. Add relevant users and groups you want to sync to GCP under Manage > Users and Groups. You have two options to sync:
- Provision on demand:
This manual process is useful for testing, troubleshooting, and validating attribute mapping expressions.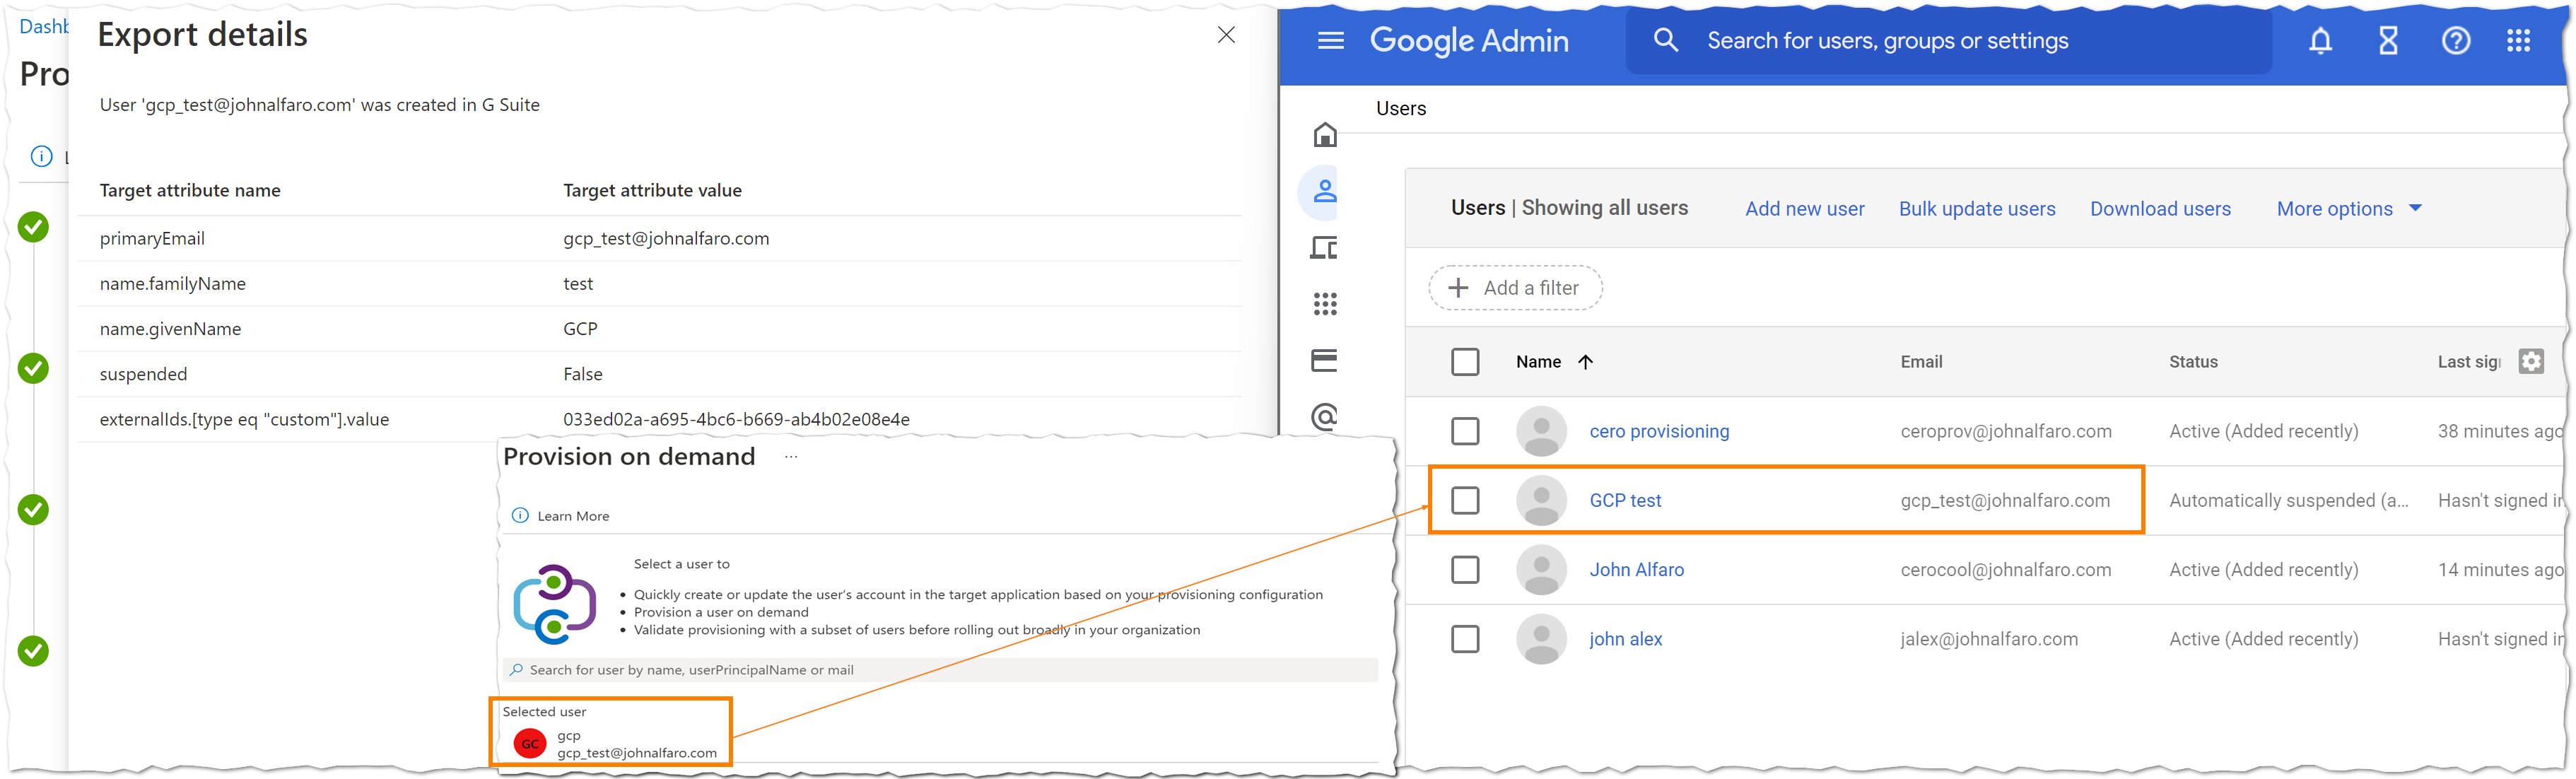
- Automatic Provisioning:
This is the recommended option. It provisions users and groups in the GCP Cloud Identity API. There is an initial provisioning cycle, followed by incremental cycles every 40 minutes.
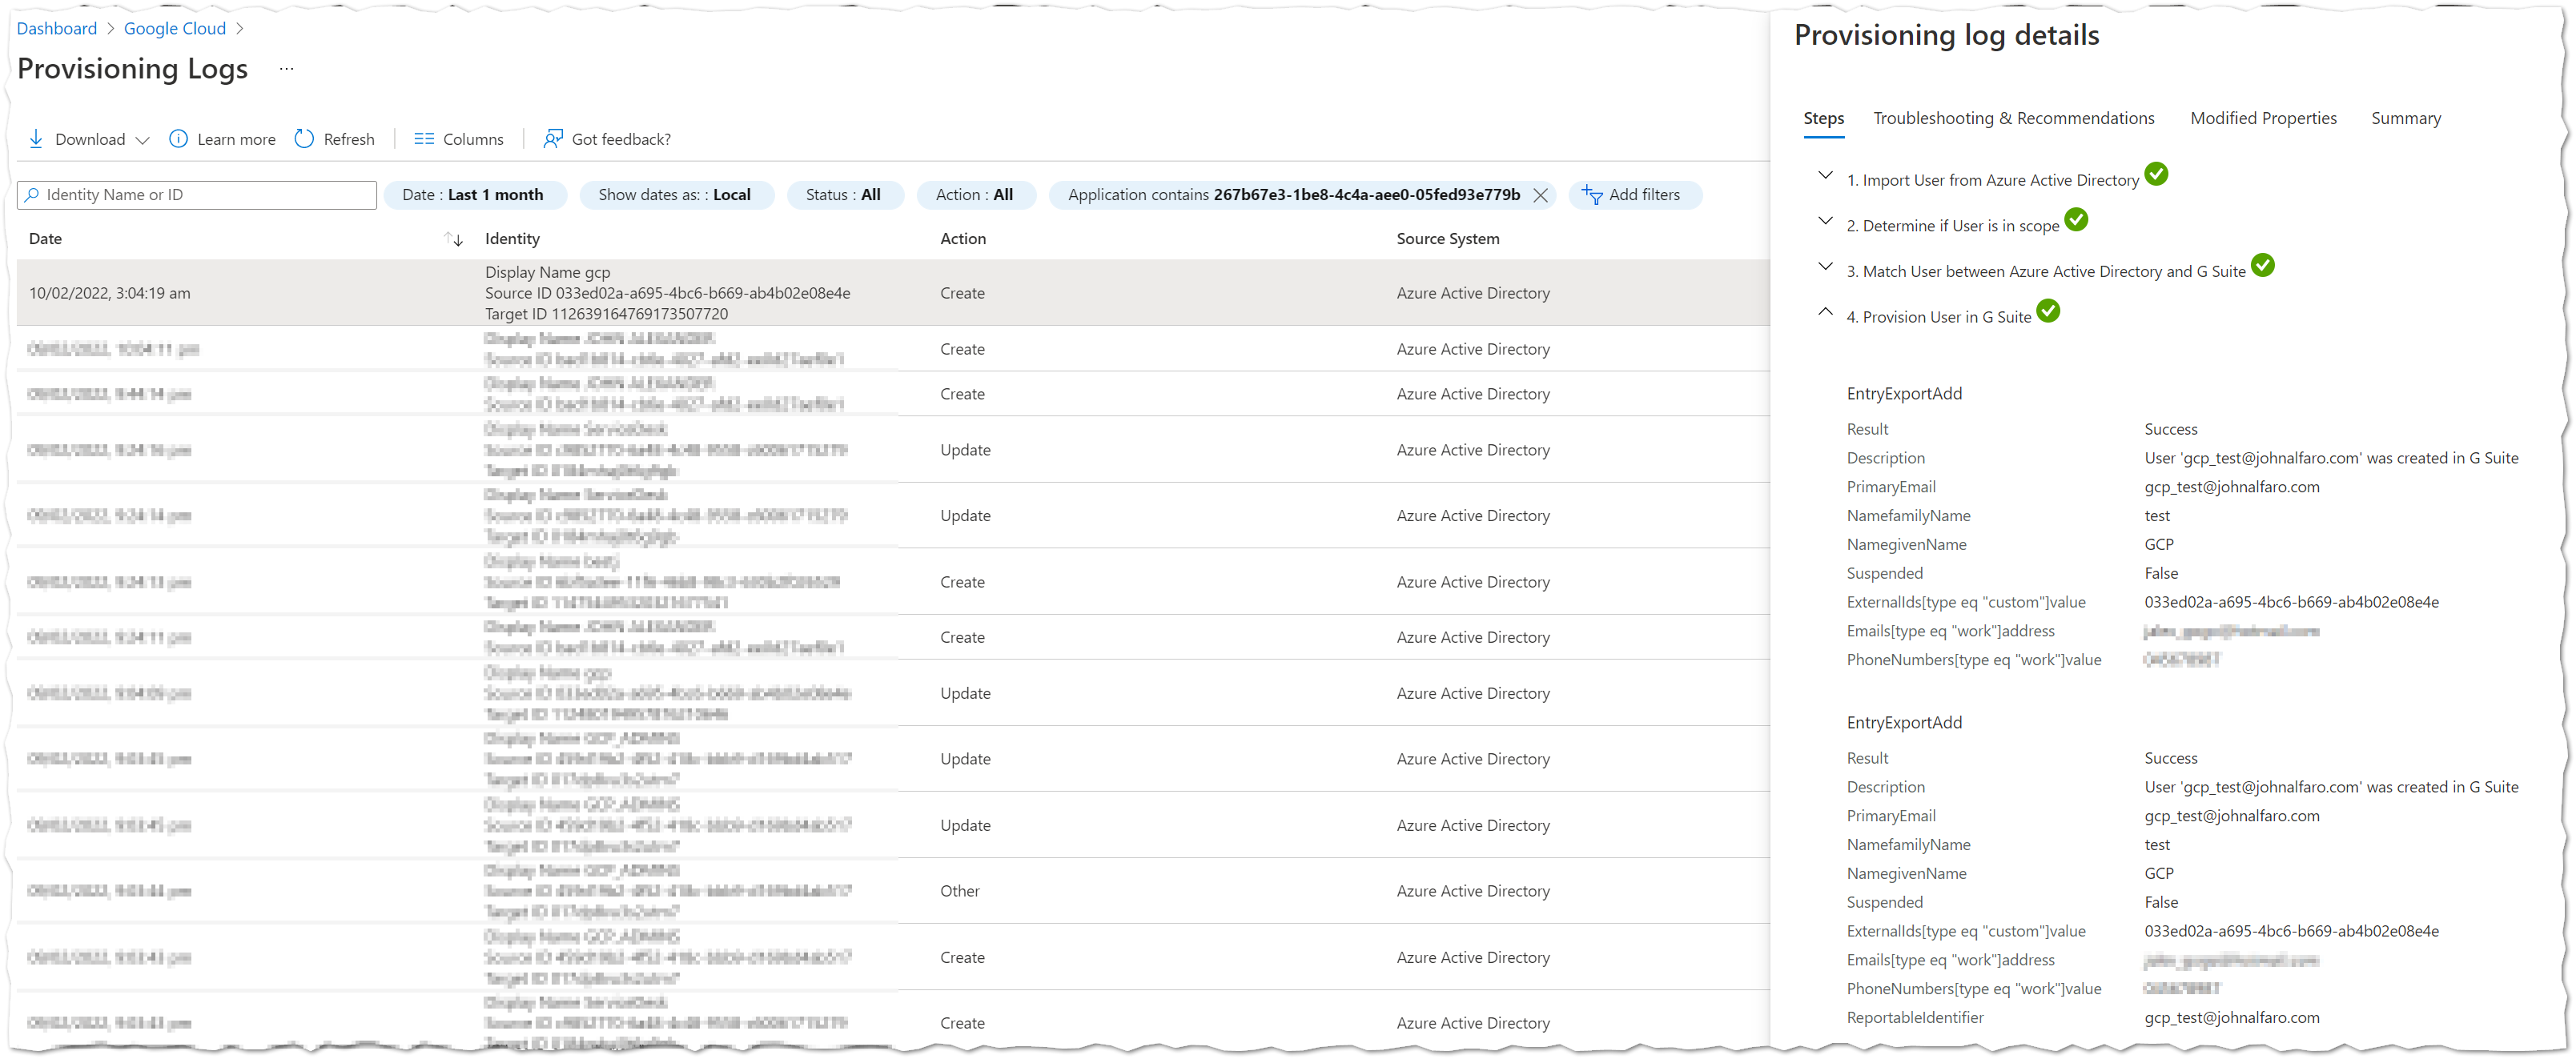
Monitoring
You can monitor the provisioning process out-of-the-box. The logs provide details about all operations run by the user provisioning service, including provisioning status for individual users and groups.
Single Sign-On Configuration
I followed the GCP documentation to set up SSO. The configuration is as follows:
- Edit the
Basic SAML Configurationwith:- Identifier (Entity ID):
google.com - Reply URL:
https://www.google.com/ - Sign on URL:
https://www.google.com/a/johnalfaro/ServiceLogin?continue=https://console.cloud.google.com/(replacejohnalfarowith your domain name)
- Identifier (Entity ID):
- Download the
Certificate (Base64)from theSAML Signing Certificate. - In
Attributes & Claims, selectuser.userprincipalnameas the Unique identifier. - In the GCP Admin Console, log in as a Super-admin and navigate to
Security > Authentication > SSO with third-party IdPthenAdd SSO profile. EnableSetup SSO with third party identity providerand configure:- Sign-in page URL: Copy from the
Set up Google Cloudcard in the Google Enterprise Application SSO Configuration. - Sign-out page URL:
https://login.microsoftonline.com/common/wsfederation?wa=wsignout1.0 - Change password URL:
https://account.activedirectory.windowsazure.com/changepassword.aspx(depends on SSPR usage) - Upload the certificate in the
verification certificatefield.
- Sign-in page URL: Copy from the

The Test-Drive 🦸♂️
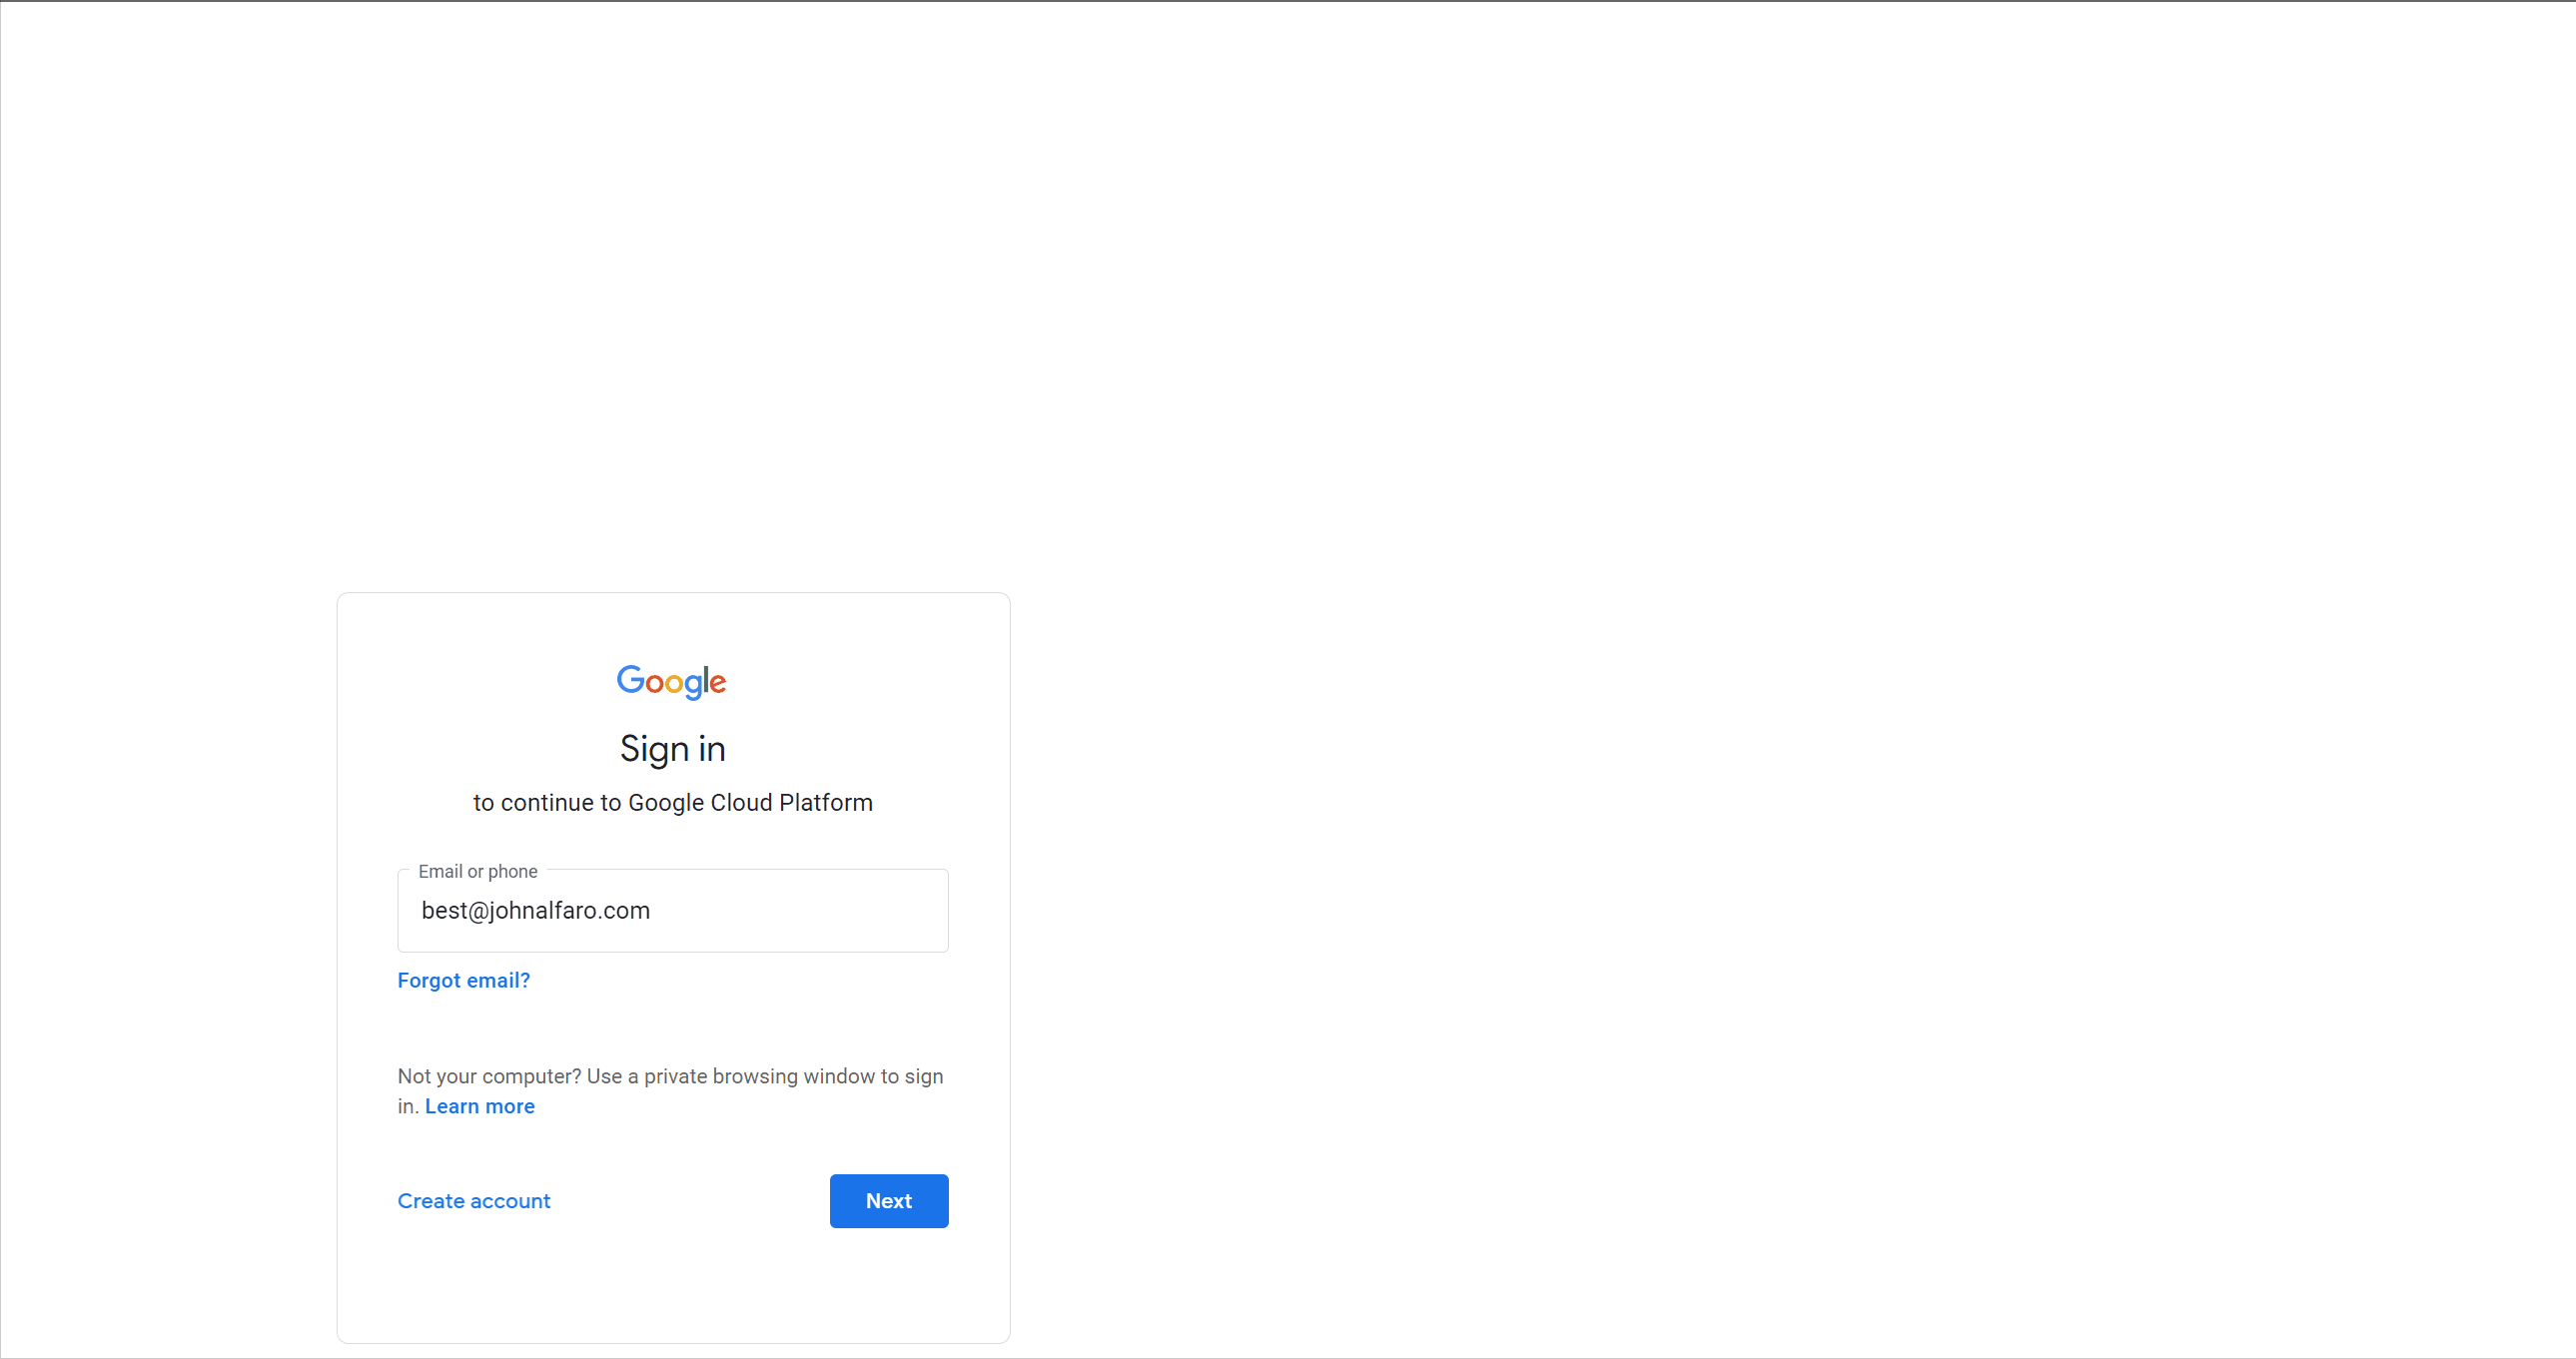
After setup, I tested the connector by adding users and groups to sync to GCP and logging in to the GCP Console. This redirected me to Azure AD for sign-in, and after successful authentication, I was redirected to the GCP Console.
Summary
The Google documentation was easy to follow, and the setup was straightforward in a demo environment. I did encounter some issues with provisioning, such as occasional quarantining during automatic provisioning (with email notifications). At the enterprise level, I would prefer to provision users and groups in GCP using the API to ensure effective syncing, especially since nested groups are not supported by Azure AD provisioning.
I also enjoyed writing this in markdown and using GitHub Copilot to help draft the blog, which reduced typos. 👨💻
I hope this helps someone and that you find it informative. Please let me know your constructive feedback, as it’s always important. 🕵️♂️ That’s it for now—Hasta la vista! 🐱🏍
🚴♂️ If you enjoyed this blog, you can empower me with some caffeine to continue working on new content. 🚴♂️


Comments